Why Is My 3D Print Under-Extruding? Fix Gaps and Weak Walls
Under-extrusion means not enough plastic is landing on each layer. Fix it cheapest-first — check the slicer flow, raise the temperature, slow the print, and clear a partial clog — before you replace anything.
Try these in order (cheapest first)
- Confirm the slicer flow rate (extrusion multiplier) is at 100% — Free
- Raise the nozzle temperature 5–10°C — Free
- Dry the filament if it has been open more than a day or two — Free–$50
- Slow the print speed down by 20–30% — Free
- Clear a partial clog with a cold pull — Free
- Check and clean the extruder gear — Free–$10
Step by step
Step 1: Confirm the flow rate (extrusion multiplier) is correct
Before touching the printer, check your slicer. Under-extrusion is often simply the flow rate — sometimes called the extrusion multiplier — set too low. Someone else's profile, an accidentally nudged slider, or a copy-paste from an old filament can leave it at 90% or 95% and you'll get thin, gappy layers at every speed and temperature. Find it in your slicer's filament or material settings and make sure it's 100%. If you've never calibrated your extruder's e-steps (how many motor steps actually push 1mm of filament), this is also the moment to do it — a motor that's even 5% under-stepping will under-extrude on every print forever, regardless of slicer settings.
Step 2: Raise the nozzle temperature
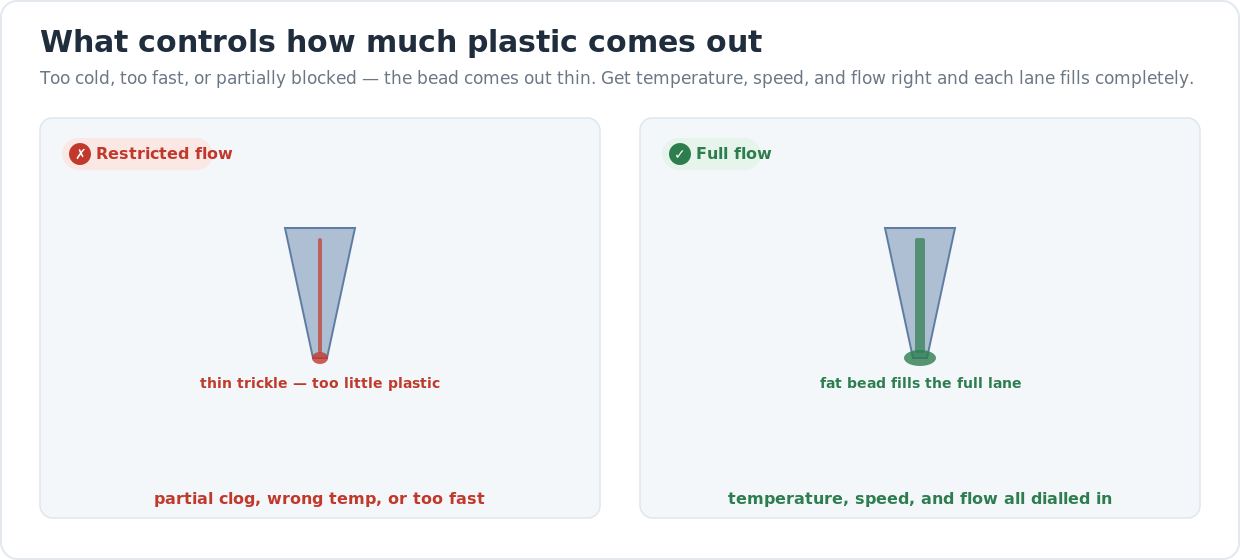
Temperature is the next most common cause and the easiest to test. The hotter the plastic, the more freely it flows through the nozzle; too cold and the viscosity goes up, the motor labors to push it through, and the output thins out. Raise the nozzle temperature by 5°C and reprint a short test. Keep nudging up in 5°C steps until the gaps close, staying inside the range printed on the spool. If you're printing PETG or ABS at the low end of their range, bumping up 10°C is often the whole fix.
Step 3: Dry the filament
Wet filament can't flow cleanly. When absorbed moisture hits the hot nozzle it flashes to steam, making the plastic foamy and interrupting the flow. The output is thin and inconsistent rather than a steady bead, and the gaps look similar to a partial clog. The giveaway is a hiss or pop at the nozzle, a rough or striated surface, and inconsistent layer widths. Nylon, PETG, PC, and TPU absorb water fastest; PLA takes longer but eventually shows the same symptoms. If a spool has been out for more than a day or two, dry it before assuming a hardware problem.
Step 4: Slow the print speed
Every filament and hot end has a maximum volumetric flow rate — a ceiling on how fast the plastic can be melted and pushed out. Push past it and the extruder motor slips, grinding rather than feeding, and plastic comes out thin. If under-extrusion started after you turned up the speed, or if it's worse on the outer walls (which print slower and so the under-extrusion shows as a gap at the boundary), slow the print by 20–30% and reprint. A slower print gives the hot end more time to melt each millimetre of filament before it needs to come out.
Step 5: Clear a partial clog with a cold pull
A partial clog lets plastic through but restricts the flow — the result looks exactly like temperature-caused under-extrusion, except raising the temperature doesn't fully fix it. The nozzle might be fine at the first layer and start gapping further up, or fine on straight walls and starved on dense infill. The fix is a cold pull (also called an atomic pull): heat to printing temperature and push filament through manually until it flows; drop the temperature to about 90°C for PLA (or 120–140°C for PETG); pull the filament out firmly in one smooth motion. The tip pulls a plug of debris with it. Repeat two or three times until the pulled tip comes out completely clean.
Step 6: Check the extruder gear
The extruder gear grips and advances the filament; if it's grinding rather than gripping, not enough plastic gets pushed through regardless of how the rest is set. Hear or feel a clicking or skipping from the extruder motor? That's the gear chewing the filament. Inspect the gear (remove the filament first) and clean out any plastic dust caught between the teeth — a stiff brush or a toothpick works. Check that the idler arm is tensioned enough to hold the filament firmly against the drive gear; too loose and it slips; too tight and it grinds a groove. A worn or damaged drive gear needs replacing ($5–10 part on most printers).
Frequently asked questions
- How do I know if it is under-extrusion or a clog?
- A full clog stops plastic flowing entirely — the extruder clicks loudly, nothing comes out, and the print head drags an empty path. Under-extrusion is a partial problem — some plastic comes out, but less than needed, so you get thin layers and gaps rather than a stopped print. Both can happen from the same root cause (a nozzle with debris) but the treatment differs — a full clog usually needs a cold pull or a nozzle swap, while under-extrusion lets you work through flow-rate and temperature fixes first.
- What does under-extrusion look like?
- The classic signs are gaps between infill lines so the inside of the model looks like a mesh rather than solid, thin and rough outer walls where the bead didn't fill the full width, weak parts that snap easily along layer lines, and a rough or pitted top surface where the top layer couldn't cover the infill gaps below. It's easy to confuse with layer-separation (cracking), but the difference is that under-extrusion gaps run along the bead direction inside a layer, while layer-separation cracks run horizontally between layers.
- What should the flow rate (extrusion multiplier) be set to?
- 100% is the right starting point for every material when your extruder is properly calibrated. Slicer profiles sometimes ship at 95% or even 90% as a conservative hedge — that's a permanent under-extrusion guarantee. The only reason to go below 100% is if you're over-extruding and the surface is showing bumps or elephant foot. Above 100% is a crutch for an uncalibrated extruder; fix the e-steps instead, then return the flow rate to 100%.
- Can printing too fast cause under-extrusion?
- Yes, and it's one of the most common causes. Every hot end has a maximum volumetric flow rate — how many cubic millimetres of plastic it can melt per second. Past that limit the motor can't push plastic through fast enough, so it skips steps or grinds the filament and output drops. Infill at high speeds is particularly prone because the motor has to keep up with fast, short moves. Slow the print by 20–30% and check if the gaps close; if they do, you've found your hot end's real ceiling.
- Will a larger nozzle fix under-extrusion?
- Not the underlying cause, but it can help with specific cases. A larger nozzle has a bigger opening, so it's harder to partially clog and easier to push material through at speed — if you're fighting constant partial clogs or trying to print faster, a 0.6mm or 0.8mm nozzle genuinely helps. But if the root cause is wrong flow-rate settings, cold printing temperature, or a dirty extruder gear, a bigger nozzle just masks the issue. Fix the settings first.
Under-extrusion is a flow problem, not a print problem
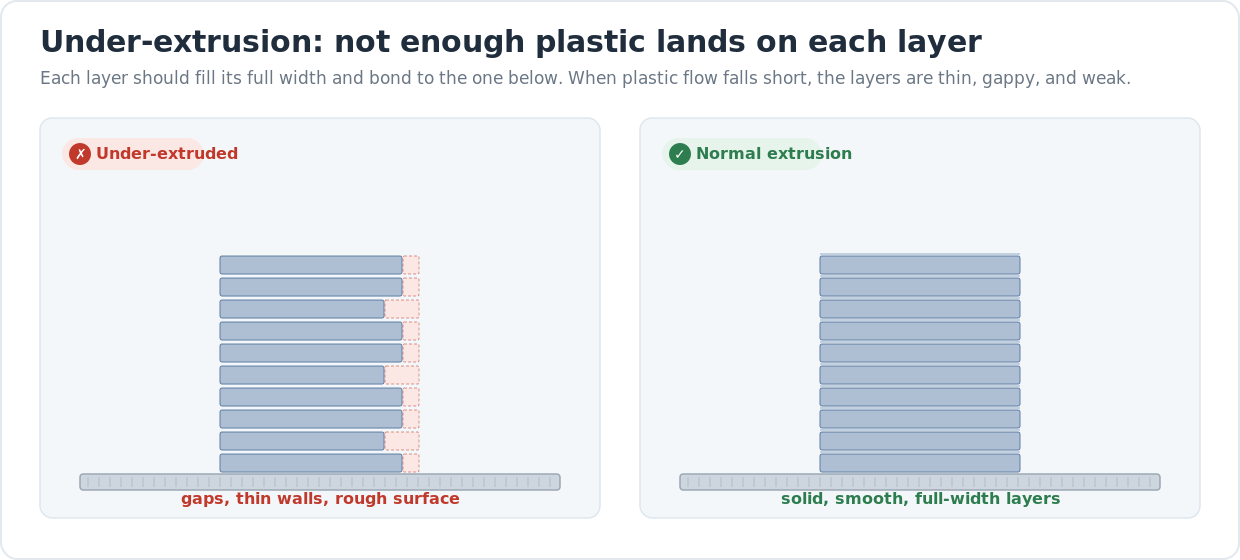
Under-extrusion happens when the printer pushes less plastic than it should on each layer. The hero diagram above shows it clearly: on the left every layer has a gap where the bead fell short; on the right every bead fills its full lane and stacks solid. The plastic itself is fine. The problem is in how much of it makes it from the extruder to the bed — and that means the fix is somewhere in the chain between the extruder motor and the nozzle tip.
That chain has only a few links: the slicer flow-rate setting, the temperature (which controls viscosity), the speed (which controls how fast the motor has to push), and any physical restriction in the nozzle or extruder. Work through them in order, cheapest first, and change one thing at a time. A gap that shows up in the infill but not the walls is almost always a speed or volumetric-flow issue. A gap that’s random and intermittent is almost always a partial clog or wet filament. Consistent gaps at every speed and temperature point to the flow-rate setting or the extruder calibration.
Why flow rate and temperature matter together
The nozzle is a flow gate controlled by two variables: how viscous the plastic is (which temperature sets) and how fast you’re trying to push it through (which speed sets). Lower the temperature and the plastic thickens, so the same push produces less output. Raise the speed past the hot end’s melting capacity and you get the same result. Slicer settings assume both are correct — if either is off, no amount of flow-rate adjustment will fully compensate.
This is also why you should calibrate before blaming the hardware. Our PLA vs PETG vs ABS guide has the typical printing temperature ranges for common materials — if you’re printing PETG or ABS at the low end of their range, bumping temperature is often all it takes.
When a partial clog is the culprit
A partial clog is the sneaky cause of under-extrusion — it mimics low temperature or wrong flow rate, but raising either doesn’t fully fix it. The tell is that gaps persist even after you’ve verified the settings. Our guide on how to fix a clogged nozzle walks through the cold-pull method in detail; it’s a five-minute operation that clears most partial blockages without swapping hardware. If your filament has been sitting out for a while, the moisture problem that causes wet-filament under-extrusion and the partial-clog symptom can look identical — dry the filament first before you pull the nozzle.
When it’s worth buying past it
Most under-extrusion is a settings and maintenance problem, not a hardware limit. The exception is hot ends with a small melt zone that genuinely can’t keep up at high speeds — you tune the settings to be slower and lower, and the printer works, but it never reaches the speeds you want. If you’ve eliminated every software and maintenance cause and you’re still fighting flow at any speed above 40mm/s, the hot end is the ceiling.
If you’re wondering which printers come with hot ends that handle high-flow printing without constant babysitting, our honest desktop 3D printer buyer’s guide notes which machines run all-metal hot ends (no PTFE in the melt zone — important for temperatures above 240°C) and which are likely to bottleneck as soon as you try to print faster than their stock profile.
Last updated
Reviewed 2026-06-30. The temperature ranges and speed adjustments above are starting points for the most common FDM materials and machines — your slicer profile and filament spool range always take precedence if they disagree. Extruder calibration (e-step correction) is a short procedure in Marlin and Klipper; a dedicated calibration guide is in progress and will be linked here when it publishes.